
Automatically Track Your Sales Cycle in Zoho CRM
Table Of Contents
Introduction
As I wrote in an earlier post , it’s important to automate the tracking of key dates in your CRM. Relying on the platform’s defaults is prone to errors and will, likely, cause you to create all sorts of workarounds to rationalize the duration of your sales cycle.
This article serves as a relatively simple example of how to do this inside Zoho CRM. Hopefully, it’ll get you started and allow you to build more complex scenarios in the future. Running through every scenario in a blog post is a) hard, and b) unlikely to be read anyway, so please reach out to me if you’d like some guidance on your particular situation.
You Can’t Rely on your CRM default dates
You are probably thinking that Salesforce, Zoho, and Hubspot track opportunity stage change dates. And you are right. However, relying on their logic can give you erratic results and will likely prove frustrating.
For example, let’s say a sales rep moves a deal from Introduction to Demonstration on 10/1/2023. Salesforce will log the opportunity stage change date, and it’s visible in the opportunity history report. on 10/15/2023, the rep accidentally moves the deal to Scoping and moves it back to Demonstration.
In this scenario, your opportunity history dates will look like this:
| Stage | Opportunity History Date | Reality | ||
|---|---|---|---|---|
| Demonstration | 10/1/2023 | 10/1/2023 | ||
| Scoping | 10/15/2023 | N/A | ||
| Demonstration | 10/15/2023 | 10/1/2023 |
You now have two erroneous dates in the system. Your Scoping date is wrong, and your Demonstration date is incorrect. When you go to run a report, you’ll see a deal that is in Demonstration with an erroneous Scoping date, and you’ll mistakenly erase 15 days from your Demonstration cycle.
While it’s possible to workaround limitations like this with some cleverly crafted reports, you won’t be able to rely on them because reports are too limited or there will always be a scenario for which you didn’t account.
How To Automate Date Stamps in Zoho CRM
I will run through a couple of examples which will hopefully get you started.
For the purposes of this overview article, I’ll focus on Zoho CRM’s automation capabilities, but Salesforce and other systems have similar concepts.
Tip
Salesforce has a sometimes-excellent tool to automate processes called Salesforce Flow Builder . If you’re not familiar with it, I recommend taking some tutorials or reading Salesforce Ben’s Complete Guide to Salesforce Flow .
Create Custom Date and Sales Cycle Formula Fields
We will be using Zoho’s process automation tool – Workflow Rules . Before we start automating things, though, we need to create some new, custom fields so we can track our dates and sales cycles.
From within Zoho CRM’s Setup->Customization section, click on Deals and Layouts. Click on the layout you want to edit, and you will see the Zoho Module Layout page.
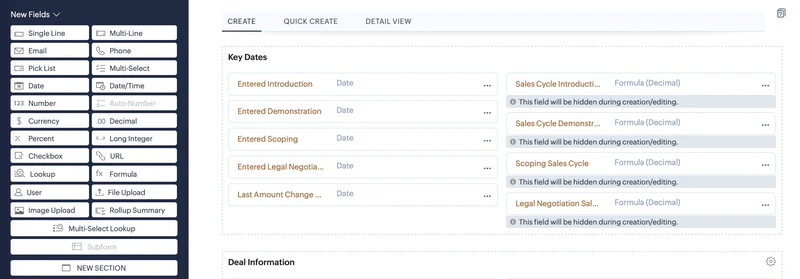
I like to keep things tidy by having a section of the page dedicated to “Key Dates”, and I created a section to accommodate that.
Once done, drag a Date field (note Date/Time) onto the page, and name it something like “Entered Introduction.” Create similar fields for each of your sales cycle stages.
Now drag a Formula field onto your screen. We will use this to calculate the sales cycle of each stage.
Here is the formula I use to calculate the Introduction Sales Cycle length:
If(IsEmpty(${Deals.Entered Introduction}),0,
  If(${Deals.Is Open?},
    Datecomp(Now(),${Deals.Entered Introduction})/1440,
    Datecomp(${Deals.Closing Date},${Deals.Entered Introduction})/1440
    )
  )
The formula does a few things. It checks to see if there is a value in the “Entered Introduction” field. If there is a value, then it won’t overwrite what’s already there – preserving our historical data and mitigating the issue I articulated above.
The formula, then, checks to see if the deal is open or closed. If it’s open, the sales cycle is ongoing and the number of days will be the difference between today and the date the deal entered Introduction. If the deal is closed, the sales cycle has finished, and the cycle is the difference between the deal close date and the Entered Introduction date.
Info
Note that I divide the results of the calculation by 1440 since Zoho’s Datecomp function returns a value in minutes, and we care about days here.
Now, simply create additional formula fields for all of your sales stages.
Set Defaults with Zoho CRM’s Workflow Rules
Now, we just need to establish some defaults in Zoho CRM, and this is easily done with their snazzy Workflow Rules.

Click Create Rule. Choose “Deals” as the Module, and name it something meaningful. Since this rule will establish defaults every time an opportunity is created, I am naming it Deal Creation - Set Defaults.
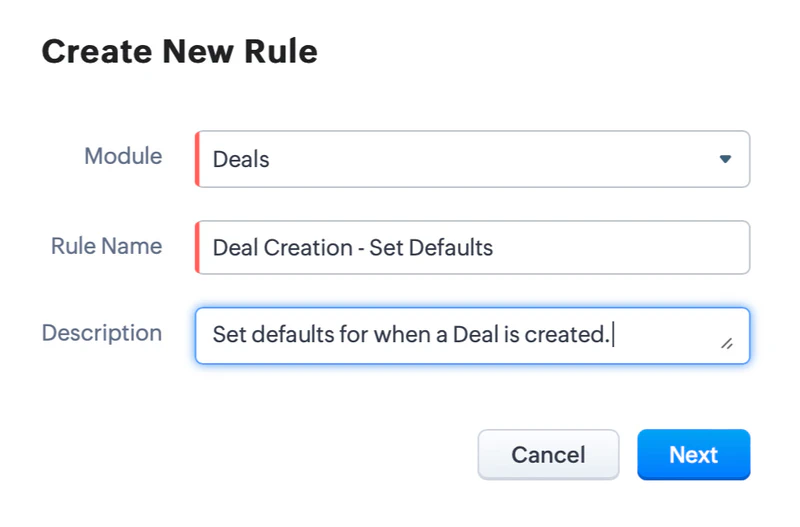
Tell Zoho CRM to execute this rule whenever a Deal is created.
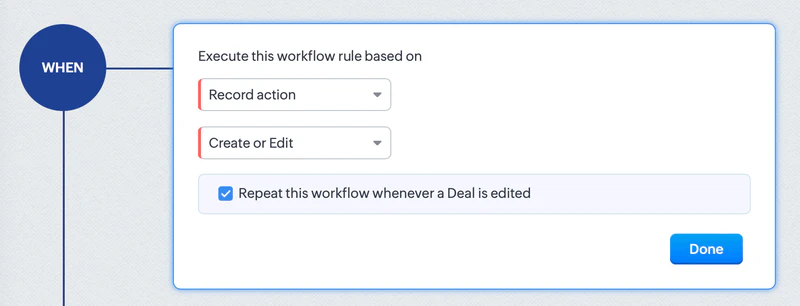
And we also want this rule to execute for all Deals.

Finally, just tell the workflow what to do. In this case, we want to update fields when the deal is created.
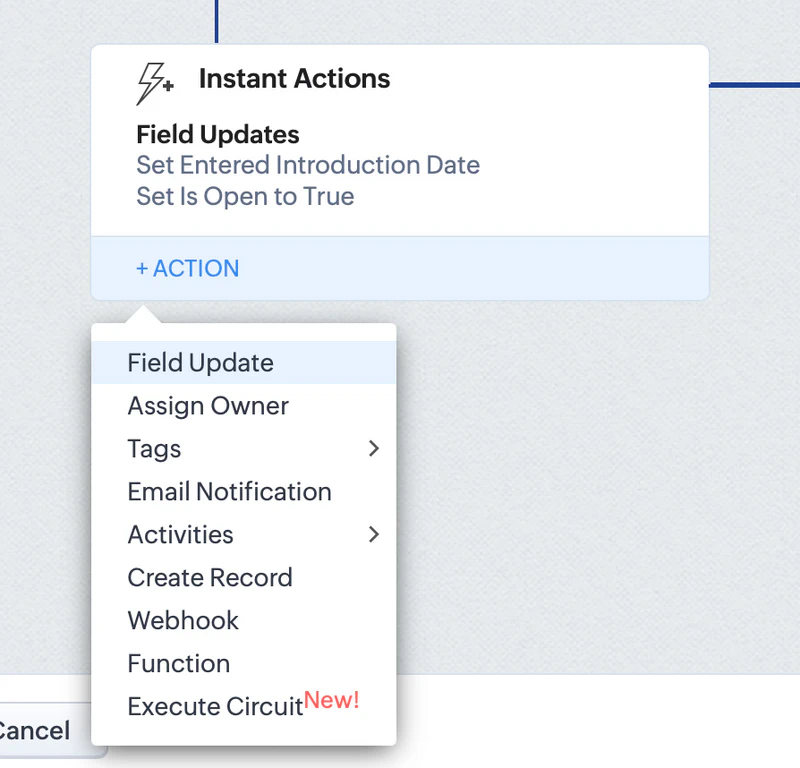
Set the Entered Introduction Date to the date that the workflow executes. This will ensure the date is always set accurately.
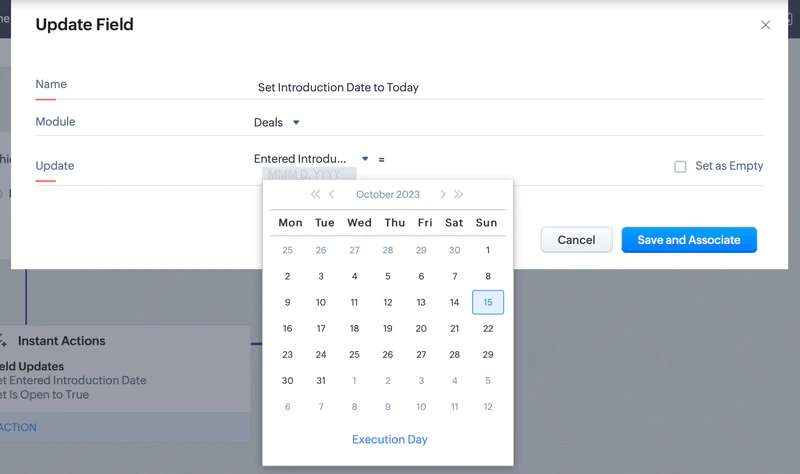
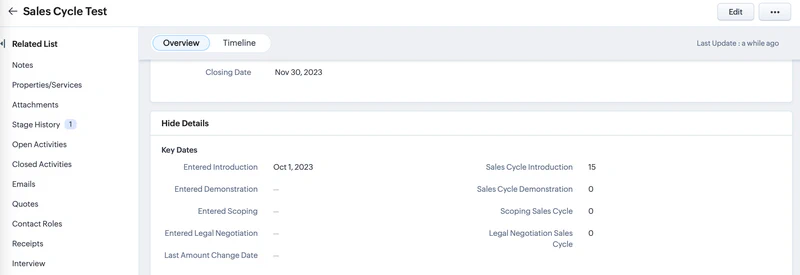
Save the workflow and create a new deal to ensure your “Sales Cycle Introduction” is calculating correctly. If it’s not, check your formula field. Since the deal is only in Introduction, your other cycle times should be zero.
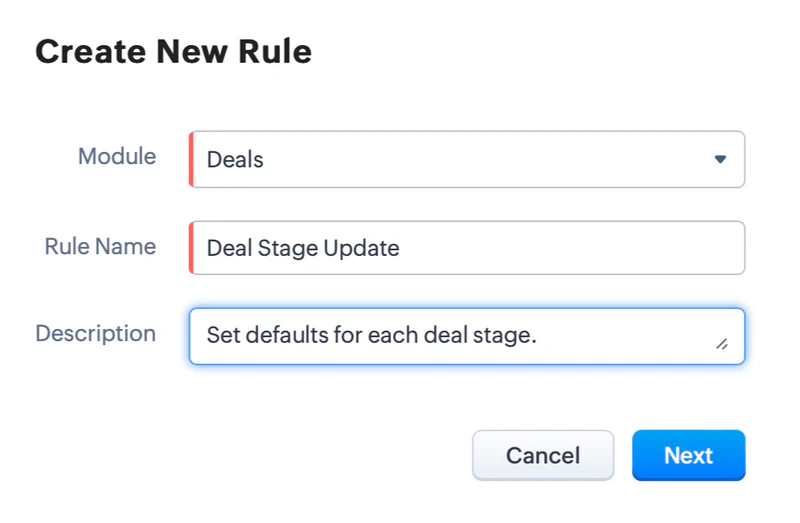
Now, we need to update cycle dates when the deal stage is updated. Let’s go back to the workflow page, and create a new rule called "
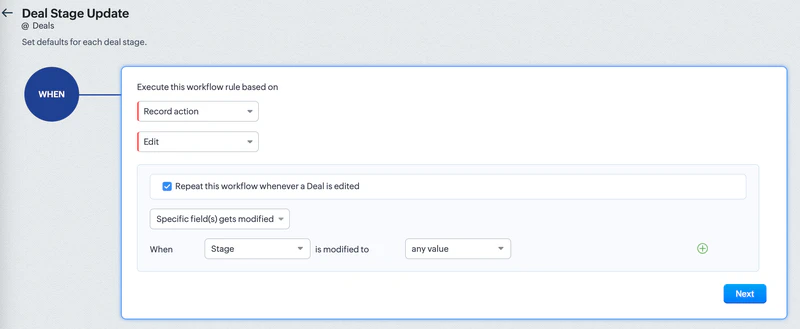
Tell the workflow rule to fire whenever the Deal’s Stage is updated.
Add a condition for when the Stage is “Demonstration” and click “Done.”

Click “Instant Actions->Field Update” and choose “New Update.”
Name the field “Set Entered Demonstration Date to Today” and tell the automation to set the “Entered Demonstration Date” to the “Execution Date.”
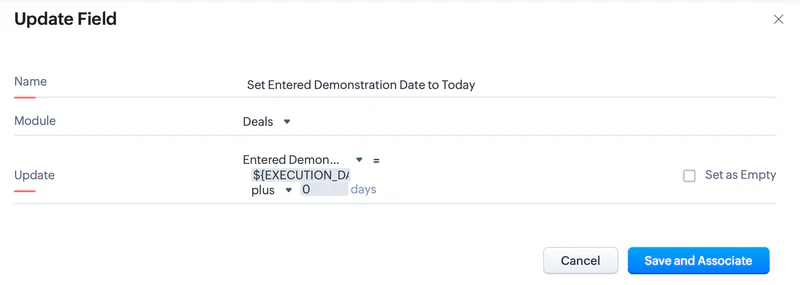
Click “Add Another Condition” and repeat the above process for your other sales stages.
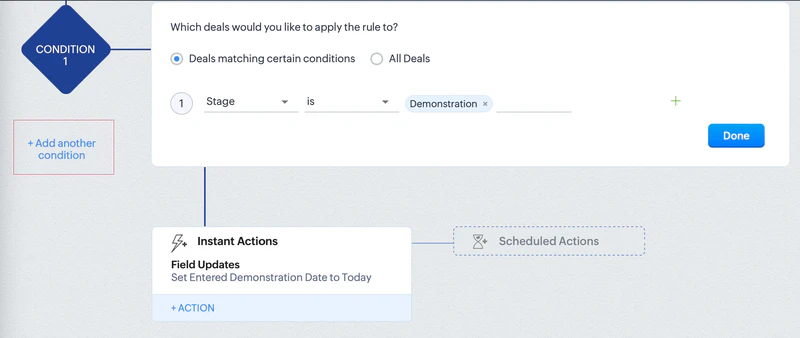
Save the workflow and go back to the deal you created earlier. Change your deal stage to “Demonstration” and check to ensure the sales cyle is updating correctly.
Change to other stages to ensure your other cycle dates are updating without impacting your Demonstration and Introduction sales cycles.

If everything looks correct, you’re done! If something is amiss, check the logic in your Formula fields or in the logic to update the Date fields.
In Summary
This is a super-easy way to automatically track the most important dates of your sales cycle. There are a number of applications to this, and I’ll likely get into those in future posts. However, just taking these simple steps will ensure that you are able to quickly and easily understand your sales cycle.
Header photo by Melanie Deziel on Unsplash